Fixed Assembly Guide
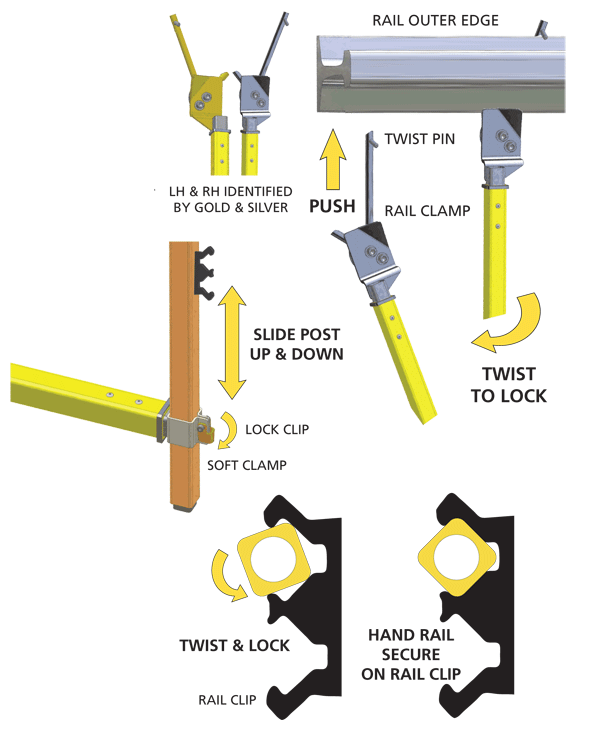
1. FIT HORIZONTAL ASSEMBLY
Place horizontal assemblies at maximum 3m centres, alternating gold then silver. With the twist pin at an angle perpendicular to the rail, push the rail clamp under the rail until the twist pin passes the outer edge. Twist the assembly to lock it into place. Refer overleaf for horizontal adjustment.
2. ERECT VERTICAL POST
Slide vertical post into the horizontal assembly’s soft clamp. With hand rails facing out,
adjust height of post to suit track environment. Close soft clamp lock clip to secure post in position by tapping to lock.
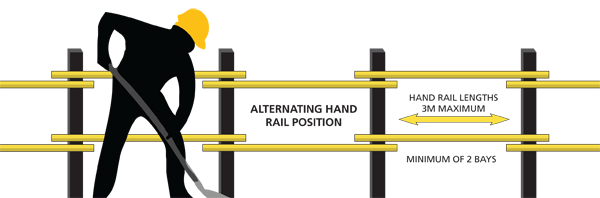
3. ATTACH HAND RAIL
Line up horizontal rail with rail clips on posts. Twist and lock the rail into place, ensuring post is left square. Alternate rail position on posts along the track (see below).
Adjustable Assembly Guide
A. ADJUST ASSEMBLY
With a gloved hand or a wedge tool, lift the spring clip until pin is released from locking location. Slide assembly away from rail clamp. Set desired safety distance from the rail and ensure the spring clip is in the locked position. Shorten assembly to pack away and fit in rack.
B. ADJUST RAIL CLAMP
Lightly loosen screw on rail clamp with a 10mm allen key. Twist assembly at an angle approximately 10o from perpendicular to the rail. Tighten screws securely and twist assembly to lock it into place.
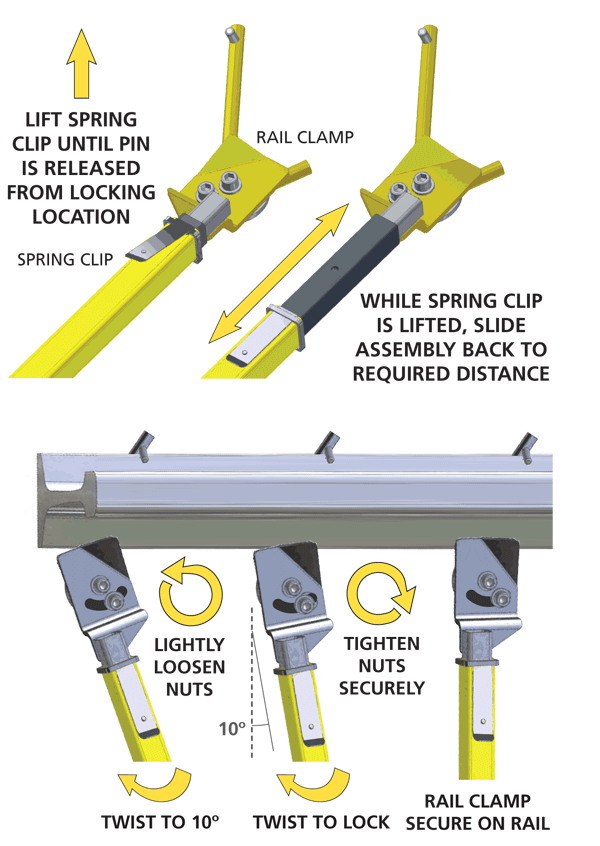
ADJUSTABLE FROM 120mm – 155mm FLAT BOTTOM RAIL BASE